You're looking at a previous version of tylergaw.com. It's very likely that there are dead links and designs that are no longer current.

Tyler Gaw

Designer + Developer


  • Aug 23 2011

    Fun with HTML Form Validation Styles

    Brass tacks: Demos; Style 01, Style 02, Style 03 and the code.

    If you haven't heard already, the current HTML Living Standard or HTML5 spec has in it some super cool form validation. This is client-side form validation that is meant to remove some of the burden of writing validation with Javascript. If you've ever written form validation with Javascript I think you'll agree that this is a very good thing.

    Using this new feature of html can be as easy as creating a form and within it creating an input with a required attribute. When the form is submitted, browsers that support validation will take the reigns and make sure that the required input has a value. If it does not, the browser will display a validation error message.

    In addition to validating required fields, the form validation will also check to make sure inputted values match given input types. New in the Living Standard are quite a few new input types such as; "email", "url", "number" and so on. Check out the full list located at https://developers.whatwg.org/the-input-element.html#the-input-element.

    Validation error messages

    As of this writing, there are three browsers that both support html form validation and display error messages when needed. Browser support includes; Chrome 10+, Firefox 3.6+, and Opera 11+. Safari doesn't care about validating your forms and I haven't checked any versions of IE, maybe 9 or 10 support this? Each browser handles the styling of validation messages differently. Chrome 12 default error messages Chrome 13 default error message Firefox 5.0 default error messages Firefox 6.0 default error message Opera 11.5 default error messages Opera 11.5 default error message

    Of the three, only Chrome currently offers a way to apply custom styles to the message. Through non-standard, Webkit-specific pseudo classes you are able to style the messages in any way that floats your boat. That's what I'm focusing on with this article.

    What about the other browsers?

    That's a good question. I haven't heard anything about Opera, but it seems that the style and even handling of the error messages is an open discussion with Firefox. I did quite a bit of digging around in Bugzilla and in the FF 6 source code, but couldn't find any solid information on what the plan is. My hope is that a standard will emerge for styling the messages, but that could be far off.

    The pseudo classes and markup

    When I first started looking into if/how the error messages could be styled I quickly came across a "Rosetta Stone" in an article by Peter Gasston, https://www.broken-links.com/2011/06/16/styling-html5-form-validation-errors. In the post Peter explains the pseudo classes that webkit makes available to target the error message elements. He's done the leg work of digging through the Webkit source code to find this stuff, thanks Peter! To reiterate some of what is in Peter's article, the following are the classes that are available to hook into:

    ::-webkit-validation-bubble {}
    ::-webkit-validation-bubble-message {}
    ::-webkit-validation-bubble-arrow {}
    ::-webkit-validation-bubble-arrow-clipper {}

    Each of those target a <div> element that is inserted into the DOM when a validation error is triggered. The markup looks like this:

    <div -webkit-validation-bubble>
        <div -webkit-validation-bubble-arrow></div>
        <div -webkit-validation-bubble-arrow-clipper></div>
        <div -webkit-validation-bubble-message>Error Message</div>
    </div>

    There are four more pseudo classes that were added as I was writing this article. These are currently only in the nightly builds of Chrome/Webkit and seem to just allow further control of the styling.

    ::-webkit-validation-bubble-icon {}
    ::-webkit-validation-bubble-body {}
    ::-webkit-validation-bubble-text-block {}
    ::-webkit-validation-bubble-arrow-heading {}

    As of this writing and Chrome 13.0.782.112 these classes do not seem to have corresponding html elements. Only the bubble-text-block and bubble-heading contain default CSS rules and they are minimal and any CSS rules applied to these do not seem to affect any changes to the current validation error messages. We'll have to wait and see how these elements get put to use.

    Default styles

    A huge help when styling the messages is knowing the default styles that Chrome applies. Luckily the default Webkit CSS is available to peruse so you can see the exact properties that need to be modified. The default styles live here; https://trac.webkit.org/browser/trunk/Source/WebCore/css/html.css

    Demos

    I set up three different demos using markup for a simple login form containing two fields. The first field is an email input that is required:

    <input type="email" name="email" required>

    The second field is a password input that is required:

    <input type="password" name="password" required>

    The rest of the markup for each demo is nearly identical, differences include; using <label> elements for the first demo and some different structural elements for each.

    To really work with the message styles, I wanted each demo to have a distinct style from the others. Demo 1 has a kind of standard-looking style with error messages that are big, bright and bubbly. Demo 2 has a sleeker, higher-tech, control panel-y look with a slimmed down error icon with no text. Demo 3 has an artsy, Draplin-inspired, Futura-filled look that carries over into big-ole, text only error messages. Demo 01 style showing an error Style 01; 37 Signals called, they want their form back Demo 02 style showing an error Style 02; this is the login form for your Starcraft forum Demo 03 style showing an error Style 03; hard to go wrong with fire engine-red Futura

    Fun with CSS animations

    Something to keep in mind when styling the messages is that most any styles that are available in Chrome can be applied to the message bubbles, this includes animations. With demos 1 and 2 I created CSS animations to bring the messages into view. Since the message elements do not exist in the DOM until an error is triggered, the animations will not run until that time. So, in demo 1, to get that little shimmy and shake I'm using the following:

    @-webkit-keyframes bounce {
        0% {
            opacity: 0.5;
            margin-left: 85px;
        }
    
        25% {
            margin-left: -35px;
        }
    
        50% {
            margin-left: 50px;
        }
    
        75% {
            margin-left: -22px;
        }
    
        100% {
            margin-left: -15px;
            opacity: 0.9;
        }
    }

    The named animation is applied to the main message container;

    ::-webkit-validation-bubble {
        -webkit-animation-timing-function: ease;
        -webkit-animation: bounce 0.45s 1;
        ...
    }

    Demo 2 uses a similar, but less complex animation to slide the serious looking icon in from the left. This demo also introduces something new; custom error message text. The message text, among many other things, can be customized through the Constraint Validation API.

    Custom message text with the Constraint API

    The Constraint API is a new one in the HTML Living Standard, it allows you to further customize form validation using Javascript. The API is large enough for a full article to explain its features and how to use it, here I'll just point out the code used to set a custom error message.

    var inputs = document.getElementsByTagName('input'),
        len    = inputs.length,
        i      = 0,
        cur    = null,
        errMsg = '!';
    
    for (i; i < len; i += 1) {
    
        cur = inputs[i];
    
        if (cur.getAttribute('type') !== 'submit') {
            cur.setCustomValidity(errMsg);
    
            cur.oninput = function () {
                if (!this.value || this.validity.typeMismatch) {
                    this.setCustomValidity(errMsg);
                } else {
                    this.setCustomValidity('');
                }
            }
        }
    }

    This is a fairly simple block of code, we start by looking at each input element on the page through a for loop, if the input is not a submit button we then use the Constraint API method setCustomValidity to apply the custom message of "!" that we stored in the errMsg variable. In my opinion that should be the end of the work needed, but there is more.

    For some reason, when we set a custom error message with setCustomValidity that also removes the error checking from the input. If we were to stop here and submit the form, it would submit without triggering any errors. Starting at the line cur.oninput is the code needed to get around this oddity. The oninput event is fired each time a key is pressed that will change the contents of the input, each time the event fires we are checking to make sure the input has a value and that the value is valid according to the input type. The Constraint API makes available a validity property for input elements. This object contains a number of properties to determine the validity of the input, the one that we're using to make sure the value given is Ok is typeMismatch. If the input either has no value or the given value is not of the correct type, we need to set the custom message again. If a correct value has been entered we then set the custom validity to an empty string, which does a kind of reset on the validation. The input will then be validated normally again.

    Going forward

    This is definitely new, new stuff, and with all fun new things it will take some time before it can be used on a wide scale. I don't think that should be seen as a huge hinderance though. The Constraint API seems mature enough to be put into use right now, with the aide of a poly fill for browsers that don't yet support it. I haven't used it yet, but at least one exists already; https://afarkas.github.com/webshim/demos/demos/webforms.html. The error message bubbles are not really ready though. With only one browser supporting custom styles, and with no small amount of finagling needed to get them looking right, for now we'll need to keep creating our own error messages. I'll take it though, this is a huge step in the right direction and I can't wait for wider browser support and even more fun new things that will no doubt come with it.

    Thanks for reading


  • July 9 2011

    A Small Redesign with a Little Sugar

    Take aways: Look at this site and fork this code if you don't feel like reading.

    Since reading Responsive Web Design by Ethan Marcotte I've been chomping at the bit to design a site using all of the fancy things written about in that little, yellow, different book. To really take those new ideas and techniques for a ride I needed a small project to work on where I could just go crazy and try every new thing I could pull out of the book and my brain. Luckily I have a never-ending stream of personal projects that can always use a little TLC. The project that I picked to revamp is a small one page site for a jQuery plugin that I wrote last year, Jribbble. The site is quick overview of the methods that the plugin makes available, documentation of those methods and some working demos.

    The design process

    Before starting a design I like to set some rules for myself. These aren't hard and fast rules, just some general thoughts that I keep in mind to guide the process and keep myself in check. The rules for this design were nothing outlandish, the design should:

    • Use a flexible grid that remains comfortable from 320px to 1280px in width
    • Be designed mostly in the browser with CSS, limited Photoshop work
    • Not use any gradients
    • Not use any Photoshop noise!
    • Have some bits of CSS "sugar"

    The last rule, "sugar", I think of as something extra, something possibly new, that you might not see that often. I'll talk about it more later.

    The first graphic I envisioned for the design was the name, Jribbble. I saw the "J" and the "b"s in a large, swooping style. A style that I would not be able to accomplish with a computer. I would need to use my hands. The vision I had for it was too large for a pencil or pen or marker. I grabbed my box of acrylic paints, brushes, my 14" x 17" drawing pad and spread them out on my definitely-not-for-painting-on Ikea coffee table. With a medium sized brush and Primary Magenta I scrawled out a couple of "Jribbble"s as well as some random strokes. The toothbrush you see in the photo I used for making paint spatters and for getting paint all over the damned place. Jribbble painting

    After the painting I took the "Jribbble" I liked most into Photoshop and fiddled with it a bit. I isolated the color from the background, applied the Twirl filter a few times to give it more character and added some of the random strokes and splatters around it for a more haphazard look. In Photoshop I set up a 958px, 12 column grid to work off of. For the banner and assorted page headers I selected Botanika Mono Web from Typekit. I don't own that font so I have to use a very advanced and elegant method for playing around with initial type layout. I input the text I need into Typekit's Type Tester and take screenshots of the text from there. See, fancy ain't it? Jribbble design

    The image above is the extent of the design accomplished with Photoshop. From that point on the rest of the design was created with good ole' CSS. Just like I have always done in Photoshop I went through quite a few style iterations; colors, type sizes, positioning, but instead of spending that time in Photoshop and only moving to the browser when it was "final" I used the medium that would be delivered to create the design. Designing in the browser, it feels good man.

    The Flexibility

    To accomplish my flexible grid, I started with a overall width of 80% on the content area. That number was somewhat arbitrary, I started with 100% and decreased the number until I felt there was a comfortable amount of room between the edge of the browser and the beginning of the content. I am setting a max-width of 1280px on the content area. Any wider than that and things started to get a little unwieldy; line-lengths were too long and in general things just didn't look good. At browser widths of 768px or narrower I wanted to gain back some of the margin so I used a media query to increase the width to 95%.

    #content {
        margin: 0 auto;
        max-width: 1280px;
        width: 80%;
    
        @media screen and (max-width: 768px) {
            width: 95%;
        }
    }

    Quick note on the media query. I'm using Sass which allows for nested styles. You'll see more of this in later code examples.

    In a number of areas of the design I use a two-column layout. To determine the widths of each column I used the oh-so-helpful formula that Ethan describes in RWD:

    target ÷ context = result

    For the columns I use the starting width of 958px as a context then determine a pixel value based off the width of each of my grid columns, 69px, to come up with widths like:

    .method-description {
        h3 {
            float: left;
            width: 40.1878914%; /* 385 ÷ 958 = .401878914 */
            ...
        }
    
        p {
            float: right;
            ...
            width: 56.4718163%; /* 541 ÷ 958 = .564718163 */
        }
    }
    More on media queries

    Throughout the design I used media queries to add more fine tuning of styles that I couldn't accomplish with percentages alone. I decrease font sizes, switch to single column layouts and make other miscellaneous tweaks as the browser width decreases or increases to specified break points. For cross browser media query support I used the Respond.js poly fill. It works great, media queries in IE7, you can't beat that with a stick! I needed to make some specific enhancements based on features as well so I used Modernizer for feature detection. I included Respond.js in my Modernizer build.

    The Good Stuff, The Sweetness, The Sugar

    How does a die-cut, scaleable background image sound? I thought it sounded pretty rad. I'll explain. I had the idea that I wanted the "Jribbble" graphic to be different colors at different times. One way to accomplish that would have been to make a number of different images in the various colors that I wanted. That would work, but I thought I could do it a more efficient way. What I did was create an image that had a set background color of #ececec with the text itself transparent allowing for a background color to show through. Jribbble background image

    With die-cut taken care of, let's look at scaleable. At its base size of 1149px by 663px the logo graphic is pretty large. At medium to large browser widths, this works fine, as the browser width decreases or increases the graphic starts to lose its intended effect and also starts to cause readability issues for other page elements. background-size to the rescue!

    #bigAssJribbble {
        background-image: url(../images/branding-die-cut.png);
        background-repeat: no-repeat;
        background-position: 15% 100%;
        -moz-background-size: 190% 140%;
        -webkit-background-size: 190% 140%;
        -o-background-size: 190% 140%;
        background-size: 190% 140%;
        padding-top: 45%;
        position: absolute;
        width: 100%;
    }

    A couple things are going on here. It's important to note that the branding-die-cut.png image is much wider than it needs to be. The graphic is flush left and the right side extends ~1049px and is filled with our background color #ececec. I do this so I am able to position the background image off the left side of the browser and not leave a gap on the right side. If there was a gap that the image didn't cover, any background color would show through where I didn't want. The width of the element is set to 100% so it is always the size of the browser. The background-size property does exactly what it says, it scales the background image to the percentages that I used. There isn't a science to those numbers, I just tweaked them until they looked right.

    Another cool thing in that block of CSS is the padding-top. Since an element has to be taller than 0px for a background image to show and I didn't want to set an explicit height due to the changing graphic size I used the percentage padding to give the element a height. Again, no science with that number, just changed it until it worked.

    Something that's not accounted for in the above CSS is the background color, the color that should show through the die-cut image. This is where I started having a lot of fun. I set up 11 media queries at different pixel max-widths from 320px to 2360px, at each of those I set a different background color for the logo as well as a number of different elements on the page. As the browser width increases or decreases the background color changes. Another little extra I use is a CSS transition to smoothly change from one color to another on each of the chameleon-like elements. An example element with a media query colorway:

    #bigAssJribbble {
        -moz-transition: background-color 0.2s;
        -webkit-transition: background-color 0.2s;
        -o-transition: background-color 0.2s;
        transition: background-color 0.2s;
    }
    
    @media screen and (max-width: 480px) {
        #bigAssJribbble {
            background-color: #4400ff;
        }
    }

    I didn't get incredibly specific with what colors I chose. I started with a base of #ff0066 and then apply cooler colors as the width decreases and warmer as it increases.

    That's CSS sugar in my view. It's not something that everyone will see, but it's just a little extra for those that are looking and into that sort of thing.

    That's all

    All in all a very fun process full of experimentation and learning for the sake of experimentation and learning. It probably took too long, so it goes. Side projects live in the off hours, the small windows of time before and after the "real" work and in the hours when you probably need to be sleeping.

    Again, the completed site lives here https://lab.tylergaw.com/jribbble and if you're interested in more of the code, fork it from its Github repo https://github.com/tylergaw/jribbble.com.

    Thanks for reading


  • May 27 2010

    All Talkie Talkie

    View the presentation slides

    View the slides

    On Tuesday, the 25th I presented an introduction of CSS3 features to a great group of folks at Refresh NYC. The new features included in CSS3 are something that I'm really interested in and very excited about so it was a good opportunity to really dig in and learn a whole lot about them in a short amount of time. For my slides I decided to not take the Keynote route and instead decided to create the presentation as HTML, CSS, and Javascript. It turned out great, not only did I get to explore the sweetness of CSS3 for the sake of presenting the information, I also used a lot of the features I was talking about to build the presentation.

    This was the first time I had put together a presentation like this and got up in front of a crowd to present it, and I loved every minute of it. You really gain a deeper knowledge of a topic when you are trying to explain it to someone else. I'm definitely going to do this again in the near future and if you've had any interest in doing so I would highly recommend it.


  • Apr 6 2010

    You Did What with What?

    View the demo

    Stuff You'll Most Likely Do Before Reading Any of This Post

    View the demo Fork it
    You'll need Safari or Chrome to view the demo

    There have been a ton of new, really exciting things going on with CSS over the past couple years and I've had an itch for a while to work with them. I started out just wanting to do a small project to get familiar with some of the newer, more advanced CSS3 features, and it quickly grew into a two month immersion into CSS3 land.

    Do they speak English in What?

    A few years back Jarrat Moody, a super talented designer, created a kinetic type motion graphics piece based on a scene from the movie Pulp Fiction; that I am still floored by to this day. Since I saw that I have wanted to create a similar piece and even made a few attempts using After Effects, none of which ever really materialized.

    Let's Do This!

    So I have my excitement over a new feature set, and inspiration from Mr. Moody, time to get to it. The Man From Hollywood is a kinetic type animation using only HTML, CSS and Javascript. All of the animation is done using Webkit CSS transition, transforms, as well as standard CSS properties. Javascript just acts as a helper to turn CSS classnames on and off at the appropriate times. All of the content you see on the demo is HTML and CSS, no images were used. The audio clip is scene from the movie Four Rooms

    Is It Practical?

    No, not really, but it's not really supposed to be. My goals were to teach myself the ins and outs of a new feature set, make something fun to look at, and hopefully help and/or inspire others to work on their own CSS3 awesomeness.

    If you enjoy it, you should Tweet it or share it on your blog or just whisper the URL into a co-worker's ear. That last one would definitely be the best.


  • Jul 27 2009

    I Less Than Three IE6

    I am not a fan of the Die IE6 Campaigns, can't get behind them. You will not see me sporting some goofy IE6 Must Die Twibbon any time soon. I take a pretty unpopular position on IE6; I do not mind developing for IE6, working with it over the past few years has made me a better, smarter developer and I am going to miss it a bit when It's completely out of the picture. Whoa, look out, you're probably thinking I'm bat-shit crazy by now, but hear me out. I have reasons.

    1. It pushes you to write proper, lightweight HTML markup: IE6 has well-known issues with the box model, strange padding and margin issue, etc. One very good way to stop these potential CSS issues is to write good markup. Easy things like making sure you are writing semantic, valid markup and using <div> tags sparingly can knock out probably 95% of these issues that seem to be such a problem for so many. In my experience, most folks' CSS issues aren't CSS issues at all, they are HTML issues.

    2. It gives you yet another chance to get creative: So what if IE6 doesn't support transparent pngs. Find a way to make that image a transparent gif or a jpg. Doesn't look as crisp as the png? So what, this is where progressive enhancement steps in, this is why we have conditional comments. Set up an IE6 stylesheet and dump all of the not so desirable CSS in there. Chances are most of your users are not on IE6 anyway, and if they are this can be a friendly little jab at them for using it. I took this route when building my site. I wanted to let anyone viewing my site with The 6 know that they are missing out so I created a completely stripped down version just for IE6, plus a nice reminder of why. It still works, you can access all the same content, it's just not pretty.

    tylergaw.com IE6 Screenshot

    3. It forces you to clean up sloppy code that other browsers ignore: I've seen this a number of times when writing Javascript. Take a look at this bit of JS:

    var someCrud = ['item01', 'item02', 'item03',];
    alert(someCrud.length);

    What's the length of the array? Firefox and Safari say 3. IE6 says 4. I'm siding with The 6 on this one, the comma at the end of the array is erroneous, it should not be there. IE6 sends the message that you should clean up your code by recognizing the extra item while the more advanced browsers ignore it and let you go on your sloppy way. This is just one example, I've come across a number of similar examples over the years, I'm sure others have too.

    4. It keeps you on your toes: If you're building websites you need to be flexible. Not all environments are going to be picture perfect, and knowing how to find solutions to problems that arise when working with a browser like The 6 is key. It's easy to just say that a browser is the sole reason for not getting something to function well. Another look at it may reveal that the first approach taken was maybe not the best. You just have to put on that thinking cap a bit.

    5. It's good to have a nemesis: What good is Batman without the Joker? You have to have someone or something that challenges you and makes your job harder, and sometimes downright frustrating. Web development is hard, that's why it's fun. How good a feeling is it to confront a problem in development and find some interesting way around it? I got a whole crappy article out of doing just that.

    This viewpoint is 100% from that of a developer. As a user, I agree using IE6 would just be a nightmare. The security issues, the lack of features that modern browsers have, etc., etc. That is one merit that the Die IE6 campaigns have. But every time I see some Johnny Developer complaining about how hard it is to build websites for IE6 and how much they hate it, I can't help but think that that person is missing out on opportunities to use their noggin. And that they are a bit of a wimp. :)

    After IE6 is gone some other browser will take it's place as the whipping boy. IE7? So, instead of just joining a campaign of wishing death on an inanimate object, I say learn to take away as much knowledge as you can from a less-than-ideal situation. Like Kuato said, "Open your miiinddddd."


  • Jun 18 2009

    Ch-ch-ch-changes!

    I slapped a fresh coat on the old website. Well, new paint, siding, frame, foundation...who am I kidding? I just burned down the old one and built anew on its smoldering ashes.

    This is the third incarnation of tylergaw.com and just like the past two versions, I've had a damn good time working on this one. I've been able to take the time to work with so much amazing code that I've never really dug into before. This is the first full site I've built using the Zend Framework which has just made me realize how completely rad it is working with a rock-solid framework. It also makes me kick myself a little for not picking it up a long time ago. I'm integrating with a number of different third party APIs, this is also the first time I've built a site doing that. How freaking cool is working with well-written, well-documented APIs?

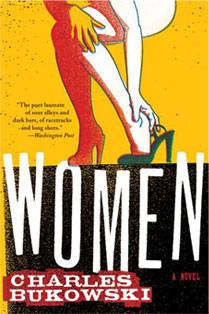
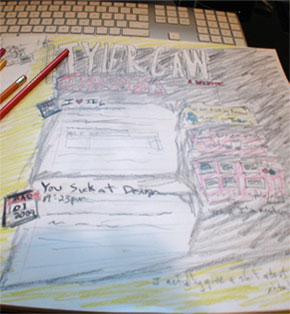
    With the visual design, I've really tried to push it in a direction that I think is, "me". This was one of those designs that I could really see in my head before I opened Photoshop or even put one thing down on paper. The biggest inspiration came from the cover art for Charles Bukowski's Women. The whole time I was reading the book, I was constantly looking back at the cover. I don't know exactly what it is but it is just so damned cool. For this round, I started the design process the old fashioned way; I grabbed a six-pack, some colored pencils, a big-ass sketch book and then went to work.

    Bukowski - Womentgaw2009 Sketch

    I'm a big fan of organic textures and knew that I wanted to incorporate some into the design. When I sat down in Photoshop to start turning my sketch into a working design, I realized quickly that I was going to need some real-world help getting the organic look and feel that I was going for. When it's time for real-world textures I just start grabbing anything, and I mean anything, and throw it on the scanner. You never know what you might use that scan of an old broken toothbrush for. Just to be sure, scan it!


Twitter

(this broke some year when the api died)

twitter.com/thegaw

last fm

    (this broke some year when the api died)

lastfm.com/user/tylergaw

Flickr

    (this broke some year when the api died)

flickr.com/photos/tylergaw